Showing posts with label Recipe. Show all posts

Friday, October 5, 2012

Food Friday!: Girl Scout Coffee Cake


Food Friday!: Girl Scout Coffee Cake

I was a Girl Scout while in elementary school and we were always presented with projects and opportunities to earn badges for our uniform. One such badge was the cooking/baking badge. In order to earn this badge, our troop leaders designed a bake-off where we were each given the same recipe- "The Great Coffee Cake"-, we were to bake it without any help from our parents (although certainly not without the supervision of our parents) in an unmarked/unlabelled baking dish, and submit it to a panel of judges (3 parents...one of which was my dad), and they chose the top three best preparations after sampling all umpteen cakes. Weathergirl and I were selected as two of the top three winners. We got our skills from our Mama...

After the competition, we had almost two full cakes left to bring home, and Banker Boy loved the cake! So much so, that he asked for us to make it for him each year on his birthday, which we did as often as we could. :) It simply became known as "Girl Scout Coffee Cake" in our family.  My mom still has the original recipe print out that was given to each of us. :) Remember, this recipe is easy enough for a bunch of elementary school age Girl Scouts to make...and not in an easy-bake oven! Enjoy!

Ingredients

2 1/2 cups flour
2/3 cups oil
3/4 cup sugar
1 cup packed brown sugar
2 tsp cinnamon
1/2 cup chopped pecans
1 egg, beaten
1 cup buttermilk
1/2 tsp salt
1 tsp baking powder
1 tsp baking soda

Directions

Grease a 9 x 13" pan. Preheat oven to 325 degrees. Cream together flour, oil, and sugars. Remove 1 and 1/2 cups of the mixture and set aside. 


To the remaining flour/sugar mixture, add egg, buttermilk, salt, baking powder, and baking soda. Mix together. Batter will be thin.


To the set aside flour/sugar mixture, add cinnamon and nuts. 


 Press half of the crumb flour/sugar/nuts/cinnamon mixture into the bottom of the pan.


Pour batter over the crumbs and sprinkle the remaining half of the crumb mixture on top. 
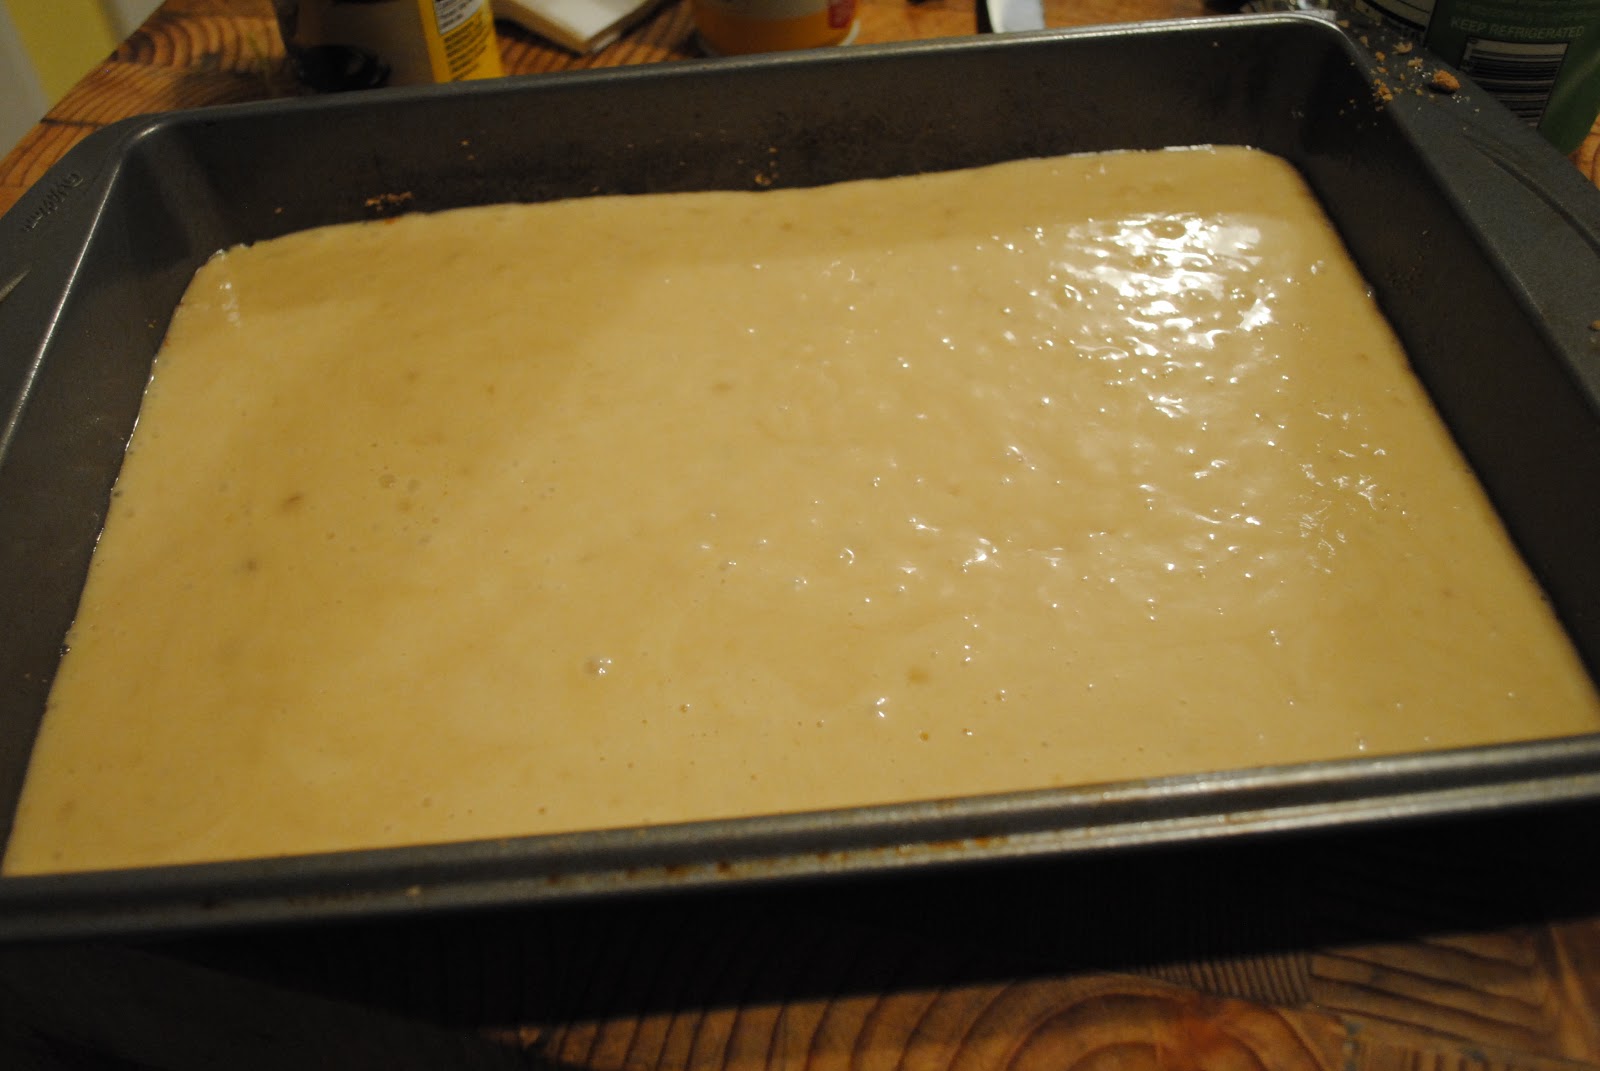
 

Bake 45 minutes, or until done (tooth pick comes out clean). 


Friday, September 21, 2012

Food Friday!: Mama's Green Sauce Chicken Enchiladas


Food Friday!: Mama's Green Sauce Chicken Enchiladas

Several years ago, around the lunch table at work, an interesting question was presented to me (thanks Jagbirder Judy!): If I were on a deserted island and I could eat any meal of my choice for every meal while stuck on that island, what would it be? My answer?? My mama's Green Sauce Chicken Enchiladas. To say I love this recipe is an understatement. It has become my "go to" recipe for when I take meals to families and I was even introduced to some new people at church by a friend who had received one of my meals as the person "who makes the best enchiladas!" (Thanks Amy!). I was even so bold as to take a Mexican friend my enchiladas after she had her baby. Boy, was I glad that you enjoyed them Mexico Morris! I couldn't believe it when you asked me for the recipe! :) Alas, your baby girl is now over a year old, and I have just now finally gotten around to posting it as a Food Friday post.

Chicken not pictured :)
 Ingredients

1 cooked chicken, shredded
2 cans green enchilada sauce
8-10 flour tortillas
3/4 cup Mexican cheese, shredded (plus a little to garnish top)
1 can diced green chiles
1 medium onion, finely chopped
Oil (for frying tortillas)

Directions

Preheat oven to 350 degrees. Pour half a can of sauce in the bottom of a lightly greased 9 x 13" pan.


Add the other half of a can of sauce to the shredded chicken (roughly 4 cups), the 3/4 cup of shredded cheese, the finely chopped onion, and 1/2-3/4 of the can of diced green chiles (I use roughly 1/2, but you can add more if you would like a spicier enchilada). Mix well.     


In a frying pan, add enough oil to generously cover the bottom of the pan. Heat over medium-high heat. Lay each tortilla in the hot oil and quickly cook for approximately 5 seconds on each side. Place on paper towel covered plate to cool and to allow extra oil to drain.


Spoon chicken mixture into tortillas, roll, and lay into the green-sauced covered pan. Generally, I make 8 tortillas per 9 x 13" pan, although you can make more or less depending on how well you stuff the tortillas with the chicken mixture.


Ok, in this case, I had a little extra shredded chicken, so I actually made 2 pans of 5 enchiladas. One we ate, one is in the freezer.


Once the pan is full, pour the second can of green sauce over the top of the enchiladas. Cook for about 20 minutes, then remove from oven, and top with extra shredded Mexican cheese. Put back in oven until the cheese melts (about 6-8 minutes). Enjoy!!


Serving Suggestion: Spanish or Saffron Rice, Black Beans, and Salad (not pictured)


This makes one pan of enchiladas. Almost every time I make this meal, I double it, making one pan for another family (or my freezer to use later) and one pan for us to eat that night. They freeze really well, but I would recommend freezing it before cooking, and before adding the can of green sauce over the top. I instead keep that can in my pantry, ready to use whenever we eat the freezer meal, and I label it with "for pan in freezer" with a Sharpie so I remember that can is spoken for. I'm sure that some of my scientist tendencies will stay with me forever... :)

Friday, August 31, 2012

Food Friday!: Chicken Taco Bowls


Food Friday!: Chicken Taco Bowls

So, I'm still pretty new to Pinterest. I have just started to use it as a resource for cooking, decor, and organization tips and I was pleasantly surprised when I found this recipe..and a crock pot one at that! Honestly, I have had some pretty bad experiences with dry, over-cooked, flavorless crock-pot meals. So much so, that I until recently, my crock pot spent much of the time under a layer of dust on a random shelf in my kitchen. Thanks to this recipe, though, I have pulled it out and really used it as a valuable appliance (for everything from making dinner to stocking up on shredded cooked chicken to cook with down the road)!  

This recipe is incredibly flavorful, and although it is easy to set up with only a handful of ingredients, it takes like I spent much more time making it. Try it! I hope you enjoy!

Ingredients

Chicken Breasts (about 1.5 lbs)
1 16oz jar of salsa
1 1/2 lb bag of frozen corn
1 15 oz can of black beans
1/2 tsp dried oregano
1 tbsp chili powder
1/2 tbsp cumin
1/4 tsp cayenne pepper
1/2 tbsp minced garlic
1/4 tsp salt (optional)
2 cups dry white rice
Shredded cheddar cheese to garnish
Fresh Cilantro to garnish

Directions

In a crock pot, place the chicken breasts. Mix together all ingredients except the rice and the cheese and cilantro (to be used as garnishes) and 1/4 cup of water and pour over chicken, making sure the chicken is completely covered.


Place lid on crock pot. Cook on low for 6-8 hours (although my crock pot cooks hot, even on the low setting, and my chicken was cooked through after only 4 hours). I would recommend checking your chicken after 4 hours.

Prepare white rice according to package. Once chicken is done, shred with fork and mix. Assemble "taco bowl" by layering rice, then adding the chicken mixture, and adding cheese and fresh cilantro on top. Enjoy!

Friday, August 17, 2012

Food Friday!: Fish Tacos


Food Friday!: Fish Tacos

Don't knock it until you try it! :)

My mom loves fish tacos. The first time she made fish tacos for dinner, I was skeptical that I would like them. I think Handsome Hubby was even more skeptical when she said she was going to make them one time when she was visiting. Much to our surprise, they are wonderful! And they are pretty easy to make once you have all the parts. Give them a try...I hope you enjoy! It's one of my favorite meals now.


Ingredients

Cod, Tilapia, or other white fish fillets (roughly 1 fillet per person if using Tilapia, which makes 2-3 tacos)
Monterrey Jack Cheese, shredded
Cabbage, shredded (I buy a pre-shredded bag in the produce section that it meant really for coleslaw)
Lime wedges
Cilantro
Ranch-based dressing (lately, I have been using Olde Cap Cod's Chipotle Ranch Dressing, although I have used original Ranch Dressing and Fresh Market's Cilantro Ranch Dressing)
Corn Tortillas
Oil

Preparation

For Corn Tortillas: Cover the bottom of frying pan with oil. Fry each corn tortilla separate, roughly 10 seconds on each side. Fold in half to create "taco" shape and place on a plate covered with a paper towel to drain. 

For Fish: Season with salt and pepper. Place in hot frying pan with 1-2 tbsp of oil and hot on medium heat approximately 3 minutes on each side, or until fish is cooked through and flaky.

Assemble Taco: Place fish chunks in taco shell. Add your preference of cheese, cabbage, cilantro, squeezed lime, and ranch dressing on top of the fish (in that order) and ENJOY!


Dinner Suggestion: Serve with Mexican Rice and Black Beans...mmmmmm!

Friday, August 10, 2012

Food Friday!: French Toast


Food Friday!: French Toast

"Brinner" is one of our favorite dinners at our house. Handsome Hubby loves it, especially my French toast...well, my Mama's French toast! The secret?!...the main ingredient: Challah bread. This traditional Jewish braided egg-bread can be found at your grocery store bakery and makes this breakfast (or "brinner") meal flavorful, rich, and fluffy, not to mention melt-in-your-mouth! It will keep you from every making French toast with any other kind of bread. :)

Ingredients

1 loaf of Challah bread, sliced in approximately 1 inch pieces
6 eggs (you can use 3 whole eggs, and 3 egg whites if preferred)
1 1/2 cups milk
1/2 cup Bisquick (or baking mix)
2 tsp cinnamon
1 tsp vanilla
1 tbsp sugar

Directions

In a large bowl, beat ingredients together. Dip each side of the thick slices of bread into the mixture (mixture may need to be stirred occasionally since some of the ingredients may sink to the bottom of the bowl) and place in pan or on griddle over medium heat. Cook both sides, flipping only once, until golden brown. Serving suggestions: with fruit salad and maple syrup! MMmmmm!

Friday, August 3, 2012

Food Friday!: Shrimp Scampi...two ways

Food Friday!: Shrimp Scampi

Happy Food Friday to you all! In an effort to not miss another Food Friday post, I thought I would at least quickly give you two links to one of Handsome Hubby and my favorite meals. Unfortunately I don't have a picture at the moment (although I did take one of this meal several months ago while still pregnant with Little T and despite the absolute deliciousness of the meal, I thought the picture looked incredibly unappetizing...), so I will rely on the food photographers of Southern Living and Cooking Light to convince you to make this dinner for yourself. :)

The Southern Living's recipe is one I found in one of their magazines several years ago and I make it often...It's my go-to shrimp meal when shrimp is on sale. I pretty much follow the recipe exactly, although I will often use Dreamfields' spaghetti noodles (low carb, high fiber pasta that has a happy side effect of lower sodium) to make the dish move a slight step in the "healthier" direction. I honestly don't think the pasta tastes any differently than normal pasta.

I made the Cooking Light recipe for the first time this week and was pleasantly surprised by how well I liked the meal with orzo instead of spaghetti noodles. Despite the fact that it uses nearly as much butter as Southern Living's recipe, let's be honest, I feel healthier eating it because it is a Cooking Light recipe. :)

Both recipes as absolutely wonderful ("Just fabulous!" as a certain relative would say...) and easy, quick recipes to prepare. Enjoy!

Friday, July 20, 2012

Food Friday!: Frozen Butterfinger Pie


Food Friday: Frozen Butterfinger Pie

Handsome Hubby and I were craving a sweet treat the other day, and with the heat lately, we knew we wanted an easy, frozen dessert! I found this recipe on Cooking Light's list of 10 Best Ice Box Pies. It was delightful! I made mine in a 9 x 13 inch pan instead of a pie pan and with Reduced Fat Nilla wafers instead of the chocolate graham crackers. Delish! I think next time I might be tempted to use two cartons of frozen yogurt instead of just the one. Enjoy!

Ingredients


40 chocolate graham crackers or 1 box Nilla wafers (let's be honest though...it was 1 box minus the 10 or so that I ate as a snack while I made this dessert)   :) 
1 1/2 tablespoons butter, melted 
1 egg white
1 carton vanilla fat-free frozen yogurt (if desired, 2 cartons if using 9 x 13 inch pan)
3 tbsp light-colored corn syrup 
3 tbsp creamy peanut butter 
1 tbsp fat-free milk 
1 Butterfinger candy bar, crushed

Preparation 

Preheat oven to 350°. Place graham crackers (or Nilla wafers) in food processor and pulse until crumbly. I actually place them in a sealed gallon sized ziploc and beat them with a rolling pin until they are crushed. :) Then add melted butter and egg white to either the food processor or the ziploc bag and pulse/massage until moist. Press crumb mixture into a greased 9-inch pie plate or 9 x 13 inch pan. Bake for 8 minutes. Cool on wire rack for 15 minutes and then place in freezer for 15 minutes.

While the crust is cooling in the freezer, let the yogurt stand at room temperature for 15 minutes to soften. Combine the corn syrup, peanut butter, and milk in a small bowl, and stir until smooth. Spoon half of yogurt onto crust. Drizzle half of the peanut butter syrup over the yogurt already in the crust. Then, sprinkle with half of chopped Butterfinger bar. Repeat the procedure with remaining yogurt, peanut butter syrup, and Butterfinger pieces. Cover with plastic wrap, and freeze for 3 hours or until firm. Enjoy! :)

Saturday, July 14, 2012

Food Friday!: Hashbrown Quiche


Food Friday: Hashbrown Quiche

Yet another family favorite for this week's Food Friday, I mean Saturday, post. Growing up, Popmiester would occasionally make quiche on nights when he made dinner. In fact, I remember it as a Popmiester dinner staple (although I do know that Mama Ne' did make it...I just remember it as a "papa meal"...like cream of wheat at breakfast). We always ate it at dinner. Banker Boy even told a flight attendant one time that "quiche is for dinner!" when she suggested she bring it to him for breakfast. He was four. :)

The beauty of this recipe is that you can make it your own. Use your own favorite cheese, meat, and vegetable- mushroom, sausage, and swiss or spinach, bacon, and cheddar. In this case, I used thick slices of deli ham, green bell pepper, and cheddar cheese. Enjoy!

Ingredients

Roughly 16 oz of shredded hashbrowns (half of a 32 oz bag)
6 eggs (you can use some whole eggs and some egg whites if you would prefer)
3 tbps milk
Salt and pepper to taste
1/2 tsp ground mustard (which makes all the difference)
~ 1 cup diced vegetable
~ 1 cup diced meat
~ 1/2 to 1 cup shredded cheese 
2 tbsp butter, melted

Directions

Preheat oven to 400 degrees. Press thawed (and squeezed out) shredded hashbrowns into a greased pie pan to form a crust. Brush melted butter over hashbrowns. Bake for approximately 15 mins or until edges begin to brown.


While the hashbrown crust bakes, prepare meat and vegetables. Also, beat together eggs, milk, ground mustard, and salt and pepper. When the crust is done baking, reduce oven temperature to 350 degrees. Then layer the meat, vegetables, and cheese inside the crust. Pour egg mixture over the top.


Bake for 30-35 mins until the egg has completely cooked. Enjoy!


Friday, July 6, 2012

Food Friday: Grilled Flank Steak with Lime Marinade

Grilled Flank Steak with Lime Marinade
I started maternity leave the week before Little T was born, with a whole 7 days before going to the hospital to deliver. It was my first "retirement" experience. Day 1 passed, day 2 passed...still loving every bit of my time off. I think I spoke with Popmiester on Day 3 and when he asked how it was going, I told him I was bored. :) Ultimately, I started encouraging my passion for cooking and found new recipes to make for dinner. Martha Stewart's website had a slew of recipes in the summer grilling section, and I selected this one to make (on top of a few others...) during that week for dinner. It came together so easily and had such a great flavor, that Handsome Hubby and I have eaten it a few times since then. I highly recommend it! We actually used the leftover steak the next night when we made these Grilled Steak Sandwiches with Goat Cheese and Arugala. Mmmmmmm!


Ingredients

1 1/2 lbs flank steak
1/3 cup freshly squeezed lime juice
2 tablespoons soy sauce (use low sodium!!)
2 scallions, thinly sliced (honestly, I forgot to buy these when I made it the last time and it was still wonderful!)
2 tbsp minced, peeled fresh ginger (or roughly 1/4 tsp ground ginger)
1/2 tsp red pepper flakes
Resealable plastic bag


Preparation

Combine lime juice, soy sauce, scallions, ginger, and red pepper flakes. 


Place steak in the resealable plastic bag and add marinade. Seal bag and place in the refrigerator, flipping the bag occasionally and allow meat to marinate for approximately 1 hour.


Grill on high heat grill, pouring excess marinade over the meat for extra flavor. Grill 6-8 minutes per side, or until desired doneness. Turn filet only once. Allow meat to rest approximately 10 minutes before slicing and serving. Enjoy!!


I would love to hear what you think of my recipes if you end up making them yourself! :)


Friday, June 29, 2012

Food Friday!: Kona Inn Banana Bread


Kona Inn Banana Bread

This is one of my favorite childhood recipes (but aren't they all?!?) that my Auntie Jacqueline got from the Kona Inn in Hawaii ...the recipe is dated 8/5/1996 (I love it when a recipe has a history!). I promise that it is one of the best, moistest, irresistible banana breads I have ever tried! This recipe makes two loaves- one for eating now, and one for freezing and eating later (or sharing... I took one loaf to a Mom's Group farewell brunch this past week). Enjoy!


Ingredients

2 cups sugar
1 cup softened butter
3 large eggs, well beaten
6 ripe bananas, mashed (the more ripe, the better!)
2 1/2 cups cake flour
2 tsp baking soda
1 tsp salt

Preparation

Preheat oven to 350 degrees. With an electric mixer, cream sugar and butter until light and fluffy.


Add mashed bananas and beaten eggs and mix well.


Sift together dry ingredients three times. Blend with banana mixture, but do not over mix.


Pour into loaf pans.


Bake 45 mins to 1 hour (err on the side of 45 mins...you don't want the bread to be too dry!).  Cool in pans 10 mins and then place on cooling rack to completely cool. Enjoy!

Saturday, June 23, 2012

Food Friday!: Baked Brie with Blackberry Preserves


Baked Brie with Blackberry Preserves

As it turns out, you can have every intention of doing something (i.e. Food Friday post on Friday...hence the name), but with a new baby, there are a lot more higher priorities that come up. So, here is Food Friday on a Saturday. :)

The other night, I went to a Ladies Fellowship night that was hosted for our Sunday school class and we were asked to bring an appetizer. When I heard that, I thought: Something easy? Something quick? Something that looks nice but isn't much effort? Baked Brie! My mama would make this when we had people over for various functions. She would serve it with some favorite crackers/wafers and garnish the plate with grapes, which made it look truly beautiful! As you can see from my pictures, I forgot the grapes. :)


Ingredients

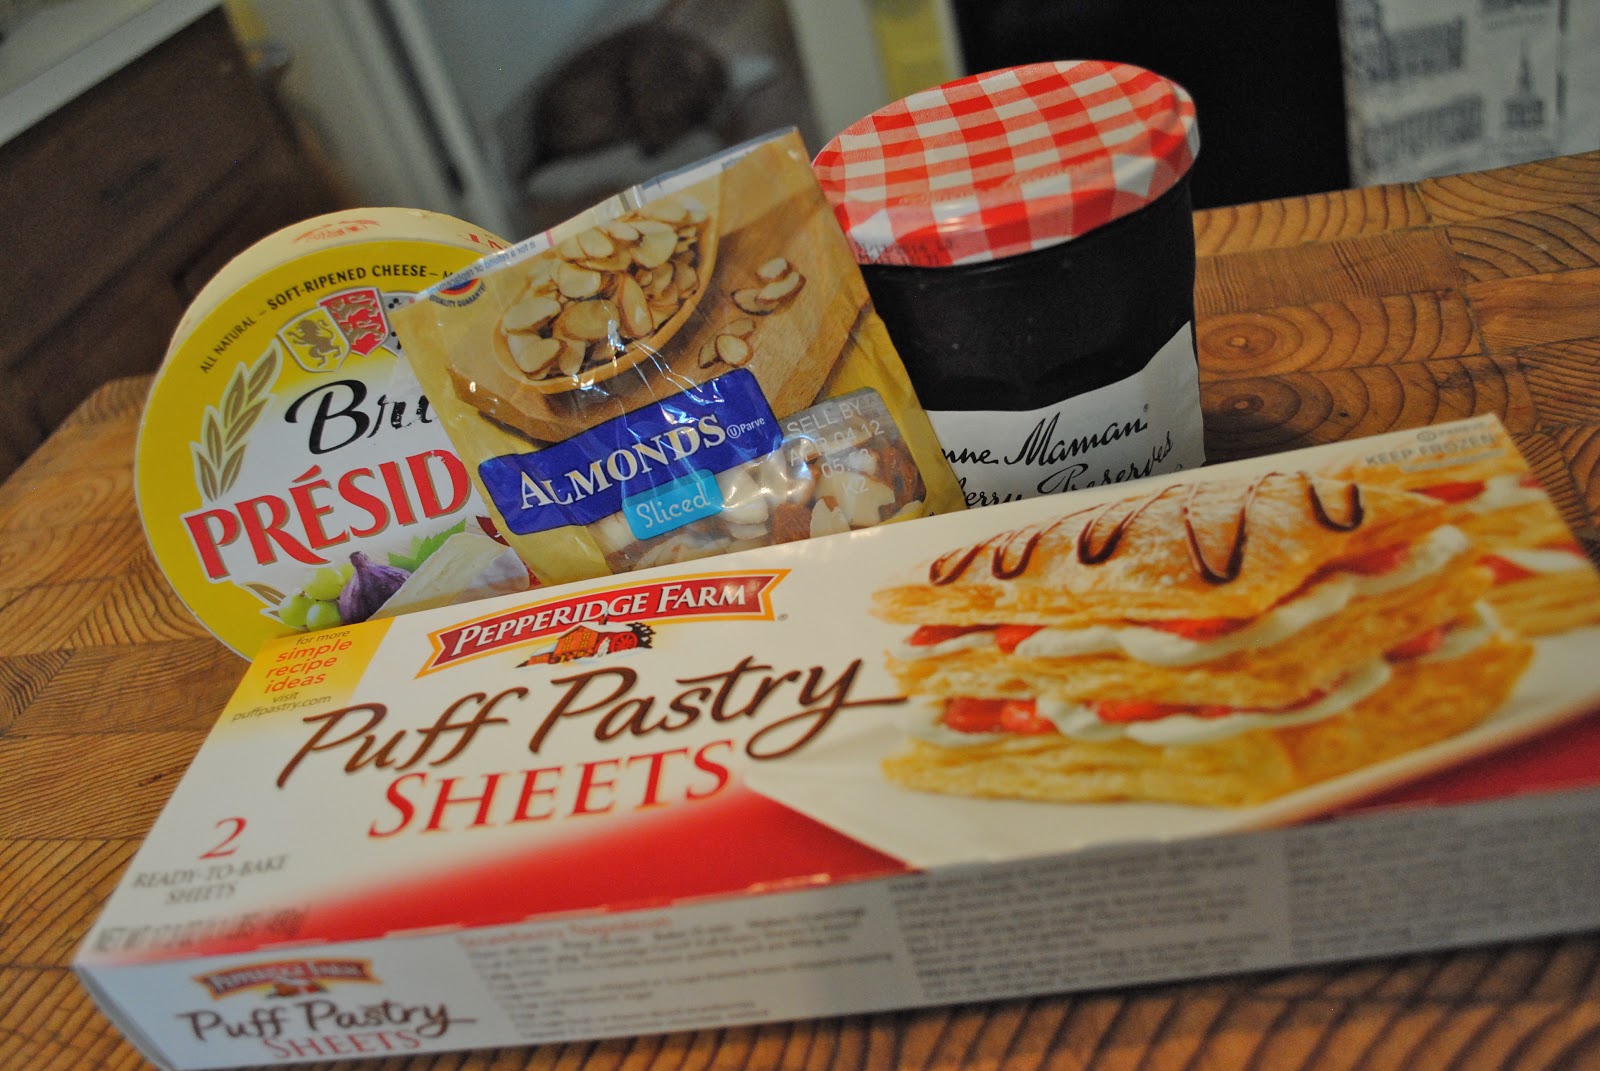
1 Puff Pastry sheet (found in the freezer section), thawed
1 wheel of Brie cheese
1/4 cup of your favorite preserves (I used blackberry)
Slivered Almonds, enough to garnish
1 egg, separated to use beaten egg white only

Preparation

Preheat oven to 425 degrees and lightly grease a cookie sheet (just in case the pastry dough isn't completely sealed, I would recommend a cookie sheet with a lip on each side).

When dough is no longer frozen, gently roll out puff pastry. I don't have a great surface in the kitchen for rolling out dough, so I rolled it out on a lightly floured sheet of wax paper. Once rolled, place brie wheel in the center, leaving the rind on. Then place 1/4 cup of preserves on the top of the cheese wheel.


Bundle the pastry dough up around the cheese wheel (now topped with preserves).


Brush dough with beaten egg white (which will help the dough stick to itself and hold together while also giving the dough a nice golden brown color when finished baking). Finish by sprinkling slivered almonds on the top to garnish.


Place on cookie sheet and bake for 20-25 minutes. Let cool for 5 minutes and serve with your favorite crackers. It's DELISH! I hope you enjoy it!

Wednesday, March 14, 2012


To all the nerds out there, Happy Pi Day!! I know, I know...what 27 year old that is no longer in school could possibly have the time or effort to remember that today is pi day (3.14 = March 14th for those that don't get it)? I do! And I'm very excited about it. So, in honor of this special occasion, and frankly because Baby Boy was craving some pie, I made Mud Pie for dessert tonight and I listed the recipe below. Enjoy! It is super easy to make and it doesn't take much skill or effort, but it does require a little patience. This was one of the favorite desserts my mama used to make when I was growing up. Contrary to the reason why we are celebrating with pie, this recipe isn't an exact science... I kinda just wing it.
To Daylight Savings Time, I am so thankful that you are here! I can now officially say that Dr. Handsome Hubby gets home from work while it is still light out (sometimes...). Hallelujah! What a privilege it has been to spend some time outside in the evenings without it being pitch black. However, I am still really struggling in the mornings... hurry, summer, so it will be light when I wake up!
To my Handsome Hubby,  The other night as we were getting into bed, you called me a "princess"...which I instantly boycotted, because I have never in my life thought of myself or desired to be a princess. In response to my protest, you said, "You're right. Only peasants sleep with that many pillows..." Thank you for always putting things in perspective.


Mud Pie, a family favorite

Ingredients
 
Chocolate Graham crackers or Teddy Grahams
4 tablespoons butter
1.5 tablespoons sugar
Tub of coffee ice cream
A jar of Hot Fudge topping

Flavors can be adjusted as you like. Handsome Hubby doesn't like chocolate, so sometimes when I make this for just the two of us, I use cinnamon Teddy Grahams, Butter Pecan Ice Cream, and Hot Caramel topping.


Directions

In a sealed large ziploc bag, place approximately 8 graham crackers or approximately 2 cups of teddy grahams and crush until pieces are fairly small. Add sugar and melted butter and mix. Dump crumb mixture into a greased pie pan, or an 8" x 8" baking dish. Press into the bottom of the pan to make a crust. "Incubate" :) in the freezer for approximately 15-30 minutes to allow the crust to slightly harden.


Once the pie crust has hardened (or at least cooled), dump the tub of ice cream onto the crust and spread evenly. It helps if the ice cream is somewhat softened. Again, place dish in freezer and "incubate" for at least an hour.


Once the ice cream has re-hardened, heat up hot fudge topping in the microwave (or per the directions on the side of the jar). Pour topping on top of the ice cream layer and smooth evenly over the top. It helps to work quickly...otherwise you end up with quite the marbled pie as the ice cream begins to melt and mixes with the fudge topping.


Place in freezer for several hours. I usually make this at least a day before serving so it has plenty of time to refreeze. Mama always served this with crushed peanuts and whipped cream on top. Mmmmm... Enjoy this special treat!


Friday, October 28, 2011

Food Friday! : Festive Butter Cookies


Buttercream Iced Butter Cookies

One of the many things that I fondly remember about the holidays (all of them!) was my mother's butter cookies (thanks Mama for the recipe!). Each holiday of course was represented by various holiday-appropriate shapes and the three of us kids devoured them. She would keep extras in the freezer, hoping we would never know they were there, and instead we just got used to eating frozen cookies. :) I almost prefer them that way now. I will admit, this recipe is a little bit labor intensive, with the rolling of the dough, cutting out of the cookies, baking the cookies, and icing them (and we never really appreciated the amount of work that went into them), but it is well worth it! And it makes for truly beautiful cookies, if I may say so myself. I hope you enjoy! 


Ingredients:


 (for cookies)
1 cup butter, softened
1/2 cup sugar
1 egg, lightly beaten
3 tsp vanilla 
3 cups flour 
1/2 tsp baking powder


(for icing)
1 box powdered sugar
1 stick (1/2 cup) butter
1 tsp vanilla
1-3 tbsp milk for thickness


Preparation


Preheat oven to 425 degrees. Cream together butter and sugar. Add beaten egg and mix well. Then add vanilla and mix well. In a separate bowl, sift together flour and baking powder. Stir into butter/egg/sugar mixture. Form dough into giant ball.


On a floured surface, roll dough (I start with about 1/4 of the total amount of dough) out until its about 1/8-1/4 inch thick.


Cut with cookie cutters. I use pumpkins and leaves for fall (although there is a very wide assortment of other shapes you can use).


Place on ungreased cookie sheet (or on silpat) and bake approximately 5-7 mins or until edges are being to lightly brown. Place on cooling rack to completely cool.


For the icing,  cream together 1/2 cup butter (softened) and powdered sugar. Then add vanilla and blend thoroughly. Begin by adding 1 tbsp of milk at a time until the desired consistency is achieved. I normally only add the 1 tbsp, but if you would prefer thinner icing, you can add more. Add food coloring dropwise until you get the color you want. I used several drops of both red and yellow for the pumpkin color and several drops of only green for the stem.

Ice the cookies once they are completely cool. It may even be the perfect opportunity to break up the task of making the cookies and ice them on a different day. The cookies can be stored in refrigerator or freezer. Enjoy!